

DKM-400HH Unloading and Installation Process
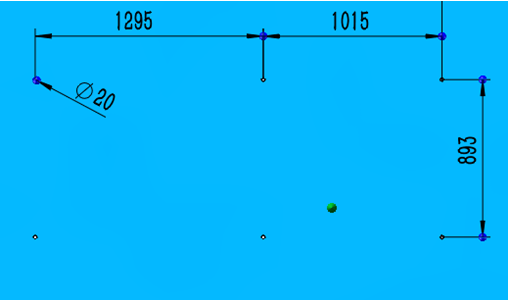
1. Make machine Foundation load (pic 1)

Pic 1
1. According to following drawing, make the hole on the ground where you want to install the machine, (hole size φ20 depth 250mm)
2. Prepare the 6 pcs anchoring of M20x300mm
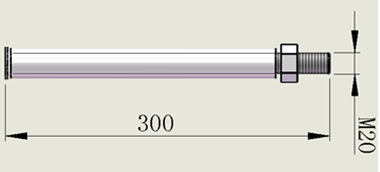
3. Put the anchoring on these holes and leave 100mm above ground
Preparation for Unloading Process
1. Equipment with 5-10T forklift
2. Equipped with 10T crane or 10-20T driving
3. Need to prepare 5-10T harness 2pieces, length is about 5-10m, then to prepare φ16 wire rope 2pieces, length is about 10-20m, and also prepare 2 pieces Jack of 5-10T.
4. Unloading in factory by using crane, this required plant door 8m height or more, door width 6m or more, plant floor height 15m height or more.
Unloading in factory by using driving, this required plant door 8m height or more, door width 6m or more, plant floor height 10m height or more.
Unloading Process
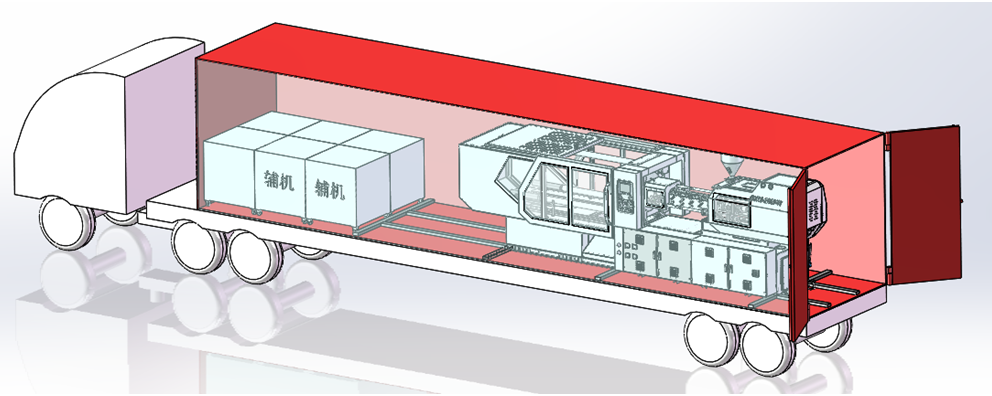
Remove wooden piece
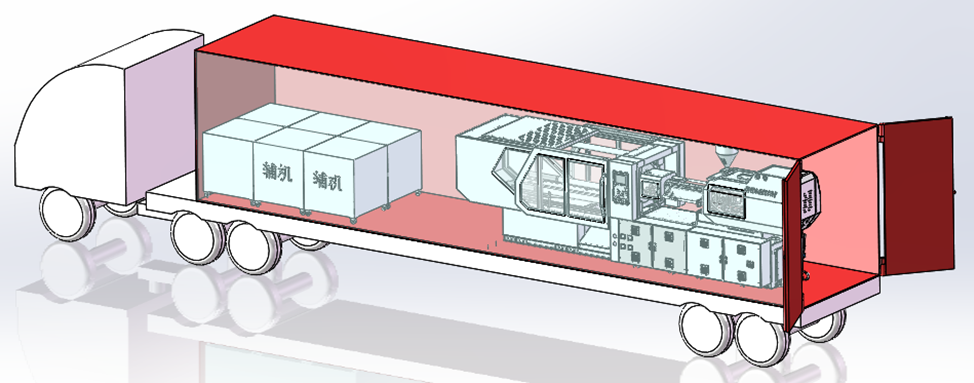
Fix the wire on the hook at the bottom of the clamping frame
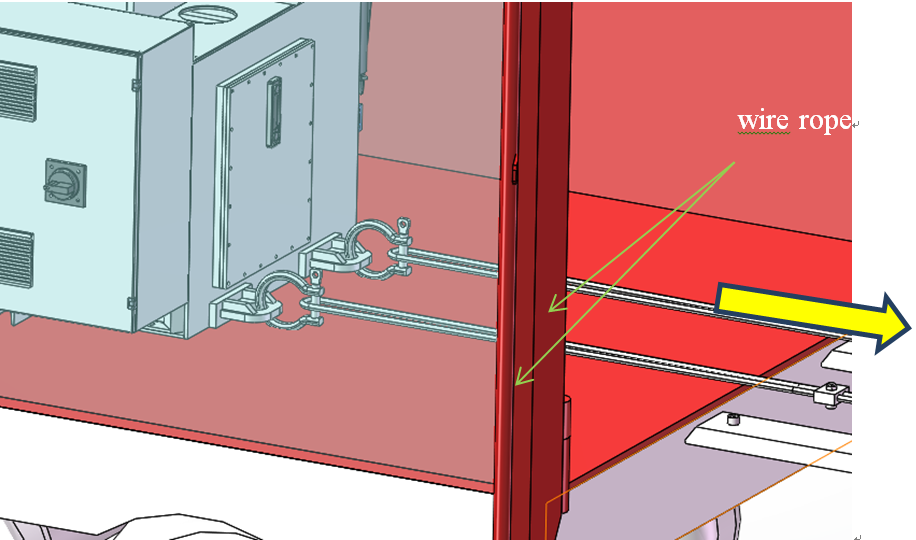
The other end of the wire rope is fixed on the forklift and the forklift pulls the machine out
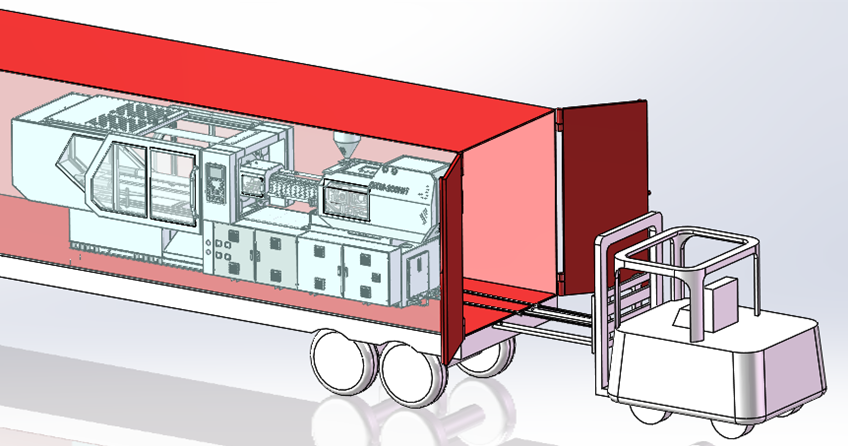
When the forklift pull machine out of the container 100-200mm, it needs remove the rope, forking machine from the top, and put steel pipe under the machine.
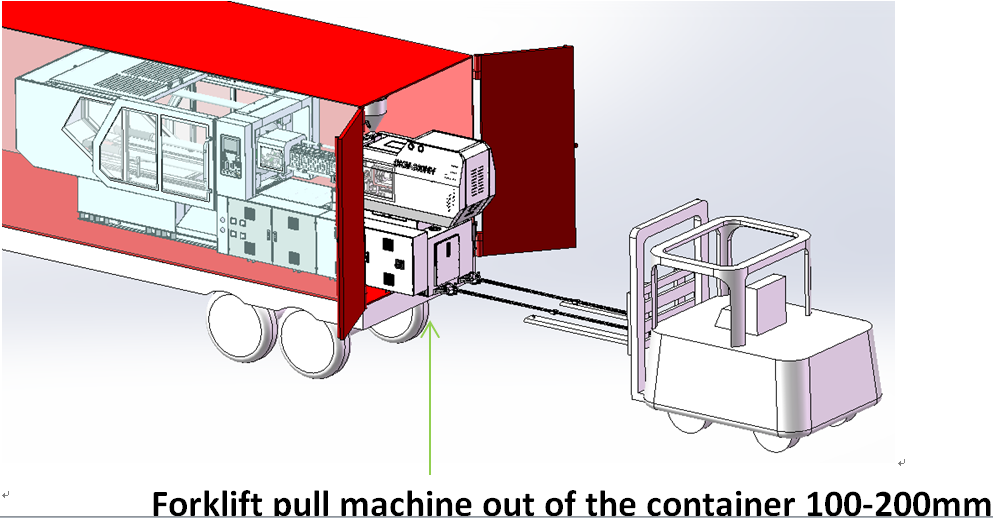
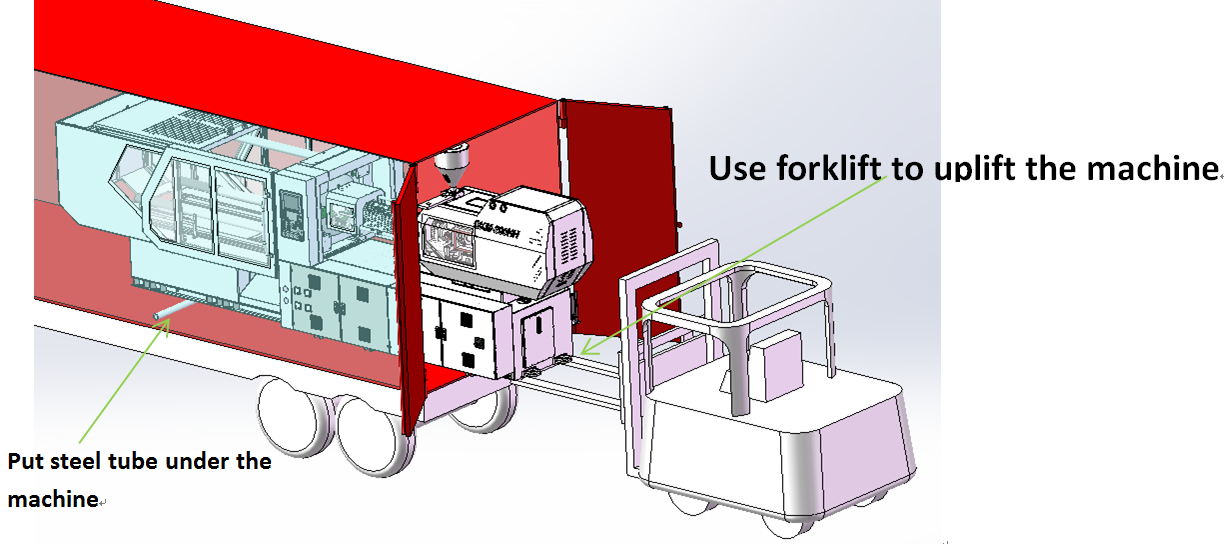
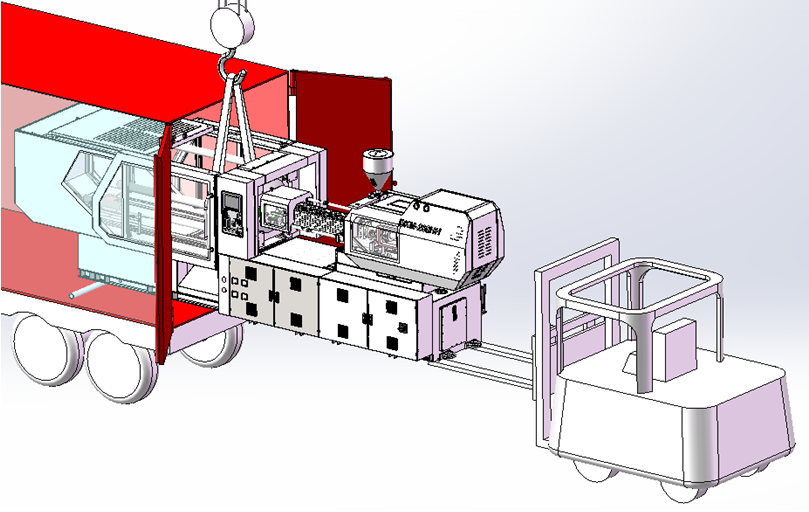
Carefully and slowly move out the machine by forklift, when the tie bars are out of container, then use crane to sling the machine and move together with forklift.
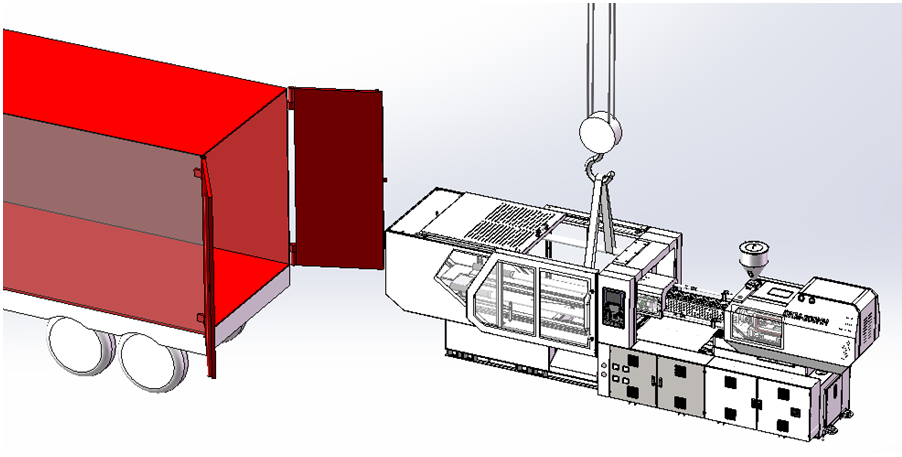
Pull it out of container, finally put it to the place where it shall be.
Installation Process
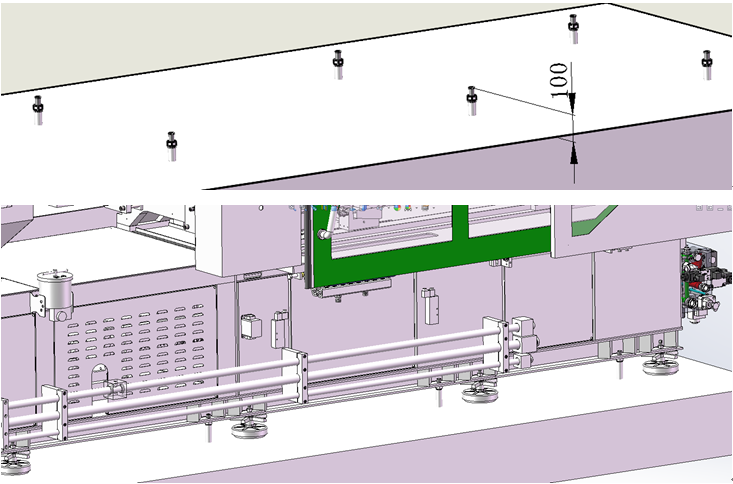
1 Place the machine to the ready foundation load
2 Level alignment
Left and right
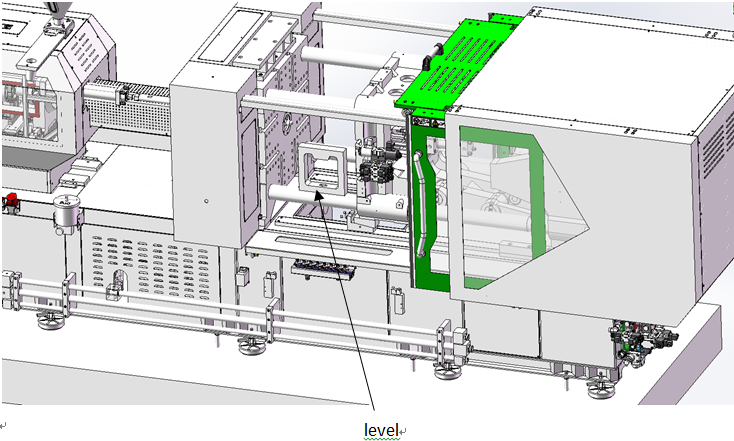
Put the level on the middle of tie bar, check that if bubbles is on middle. When the bubbles to left, it shows the left side is higher, need to adjust the right side to make it level. When it is right, adjust the left similarly.
Front and back
It is same as the left and right, just change the place for putting level: like the picture, it should be put on the middle between the tie bars.
Note: the difference shall not be greater than 0.05mm.
3 after leveling machine, tighten the feet and anchoring.
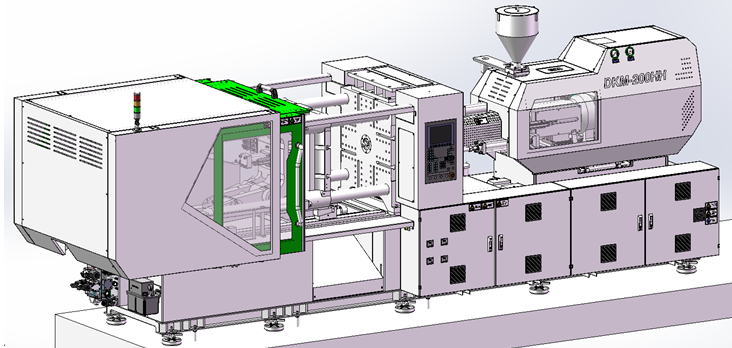
Fill Hydraulic Oil & Connect Cooling Tubes for Machine
Fill hydraulic oil to the injection molding machine, 46# hydraulic oil for mean climatic temperature 0 ℃ to 40 ℃; 32# for about 0 ℃ to 10 ℃.
Auxiliary equipment needed for pumping unit (manual or semi-automatic)
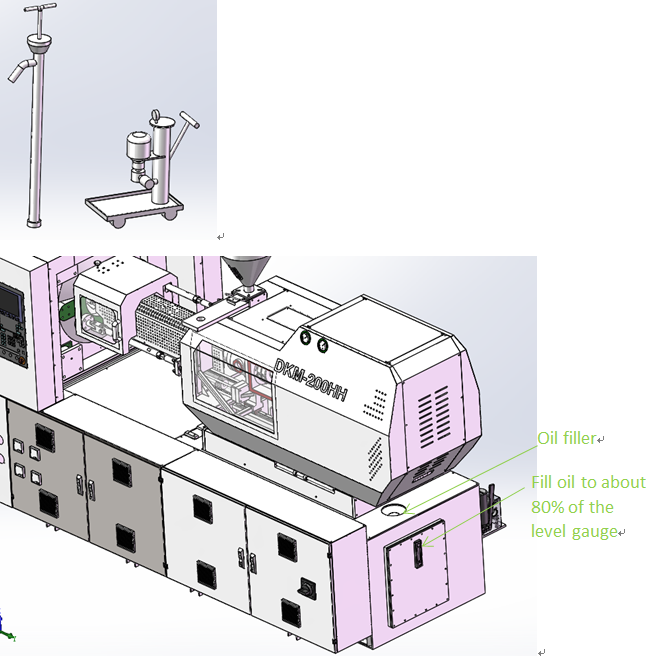
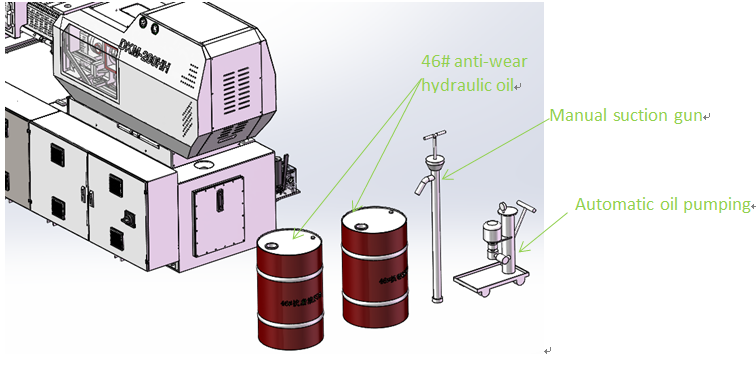
Electrical Connection Process and Notes
1. Inspection the voltage and frequency fit the machine specified. Check the nameplate, such as: 220V, 380V, 415V, 440V etc.
2. Select the corresponding cable to prevent the short circuit accident caused by over current.
3. heck the machine model、voltage、phase sequence,Prevent the wrong connection (cause equipment damage).
Machine power = voltage (V) * current (A), calculate the wire specifications, to match with the wire correctly.
3.1. Connect the electricity according to the U/V/W. As the figure shows:
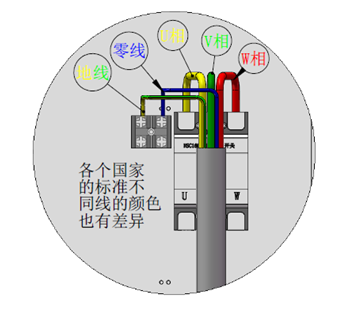
3.2. The zero line of distribution cabinet is connected to the N;
3.3. The ground wire of distribution cabinet is connected to the symbol of Ground Line.
4. Turn off electrical power and under the principle of up in down out, connect the power of the injection molding machine first, and then connect the distribution cabinet; to prevent the misoperation of others.
5. On equipment wiring,according to first connect the equipment on the line (switch off), then connect to the power distribution cabinet breaker (or air) principle; distribution cabinet wiring should first disconnect the circuit breaker, with a pencil or a multi-meter to test, to ensure that no voltage, lord it can be connected to power line equipment.
6. When supply the powers, turn on the distribution cabinet at first, and then turn on the equipment.
7. Turn off the power, turn off the equipment firstly, and then turn off the distribution cabinet.
8. When disconnecting wires, remove the power supply line of the distribution cabinet, and then remove the wires on the equipment.
9. During equipment repair, turn off the circuit breaker and sign the "do not turn on" on the main switch.
Auxiliary Equipment Installation and Connect Power and Notes
Connect the auxiliary equipment to the injection molding machine or other machinery one by one.
1、 Dryer Installation (attached drawing)
2、 Auto Loader Installation (attached drawing)
3、 Chiller Installation (attached drawing)
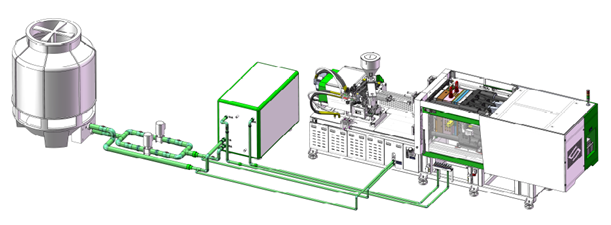
1. All high-power auxiliary machines shall be connected on power distribution box.
2. For those auxiliary machineries, connected to plastic injection machine, check the power and the corresponding size of the aviation socket switch.
3. After testing, turn off all the machineries, avoid accident because of the dry running.
4. When connect the electricity, pay attention to the safety of electricity, only connect allowed when confirm no electricity.
5. When connecting powers, connect with the auxiliary equipment firstly, and then connect the distribution cabinet;
When disconnecting, remove the line of the power distribution cabinet at first, and then dismantle the power line on the equipment.